Adding Contact Addresses to the Map
There are a number of ways to add an address to a Contact.
Simply typing an address into the Address field of a Contact is not enough – we need to “geocode” the address.
Geocoding
Geocoding is the process of converting a typed address into Latitude and Longitude co-ordinates (eg “-41.316413, 174.8007337”). These co-ordinates are what enable a pin, or marker, to be placed on the Map.
So what methods can we use in ServicePlanner to geocode an address?
Geocoding from the Contacts Screen
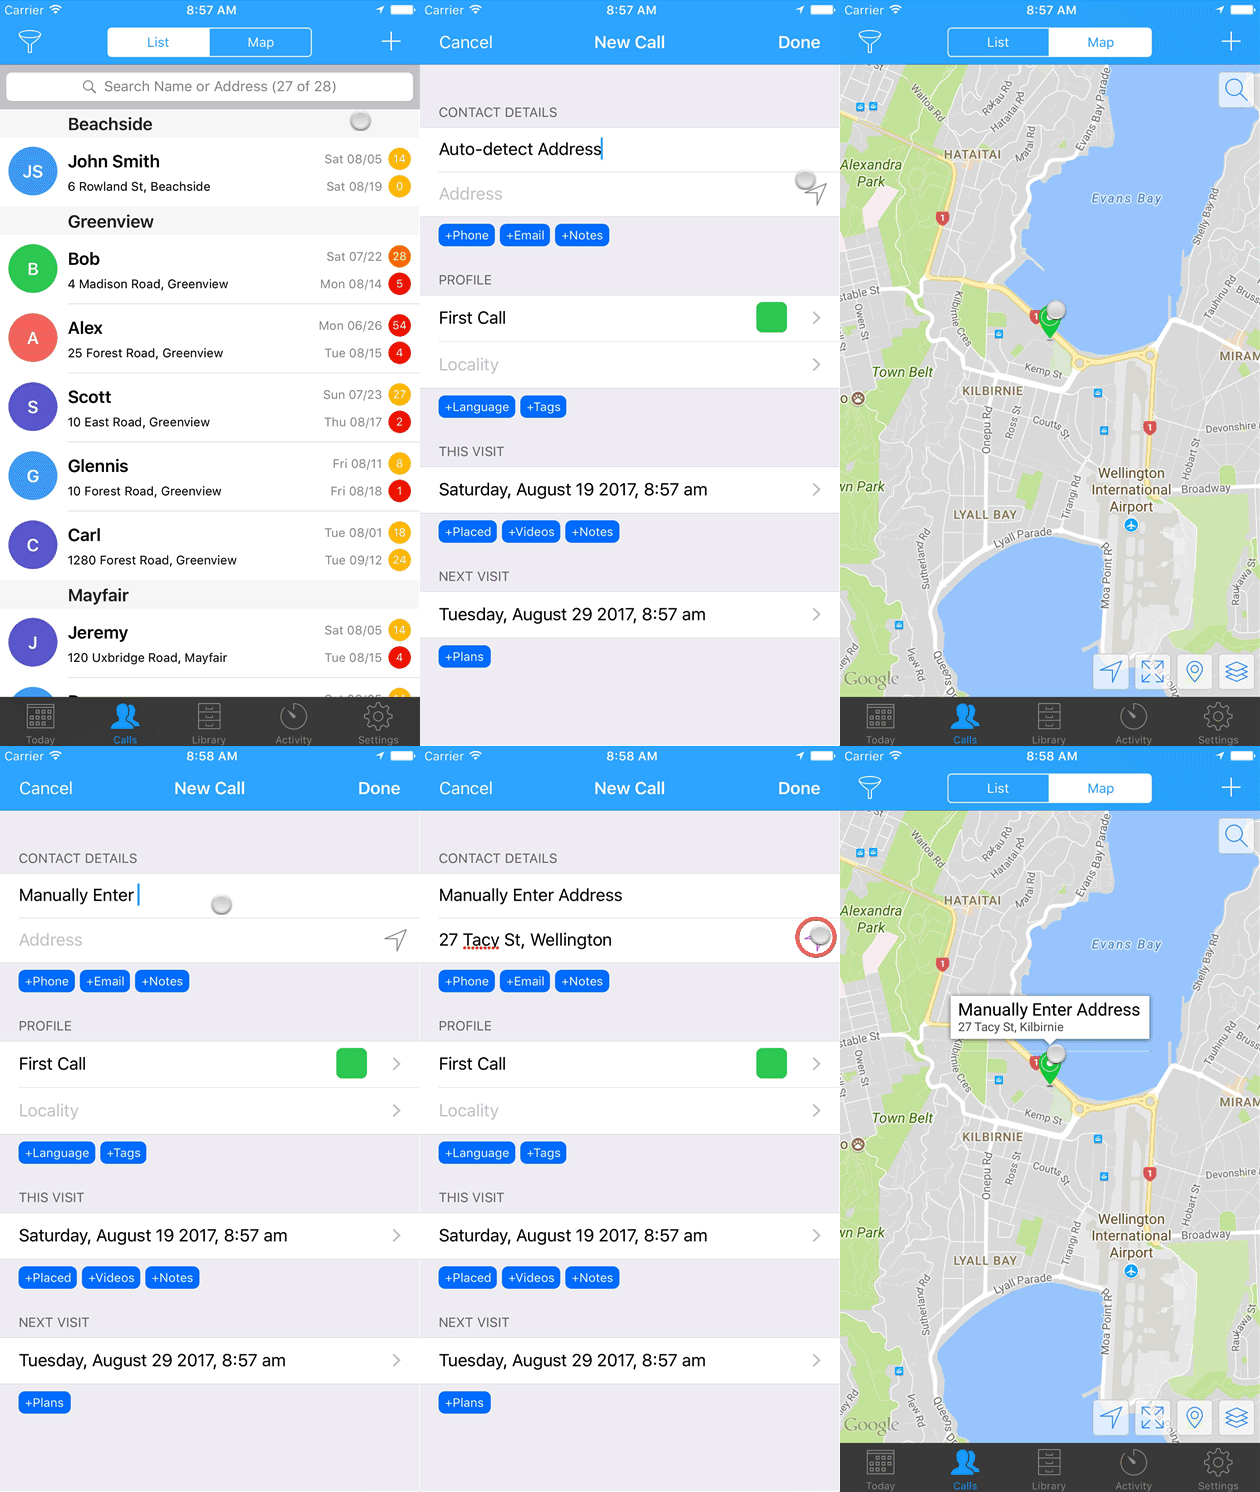
Click the “+” button to add a new Contact. You now have the following options:
- While the Address field is still empty, use the Locate button to auto-detect and geocode your current location.
- If you have typed in the Address already, use the Locate button to geocode that specific address.
If you change the address at all, then you will need to hit the Locate button again to geocode the altered address.
Example Screencast from the Contacts Screen
Advanced Tip
In the screencast above, did you notice that when manually entering address in the second example, when I clicked the “Locate” button the address was reformatted from “27 Tacy St, Wellington” to “27 Tacy St, Kilbirnie”? This is because that is what I have told it to do in the Settings > Addresses. I do in fact want the Suburb to be used (Kilbirnie) instead of the City (Wellington). If you don’t want to have the address reformatted you can go to Settings > Addresses, and turn off the “Reformat the Address” option … or you can change the “Address Format” to suit your preference.
How do you know if you have correctly Geocoded the Address?
There are 3 clues to look for:
- If you still see the Locate button on the Contacts screen … then you have not looked up and geocoded the address.
- If you do not see a Marker for the Contact on the Map … then you have not geocoded the Contact address.
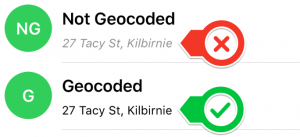
- If you are looking at the list of Contacts and you see the address showing in Italics … then you have not used the Locate button to geocode the address.
Entering a Geocoded Contact from the Map
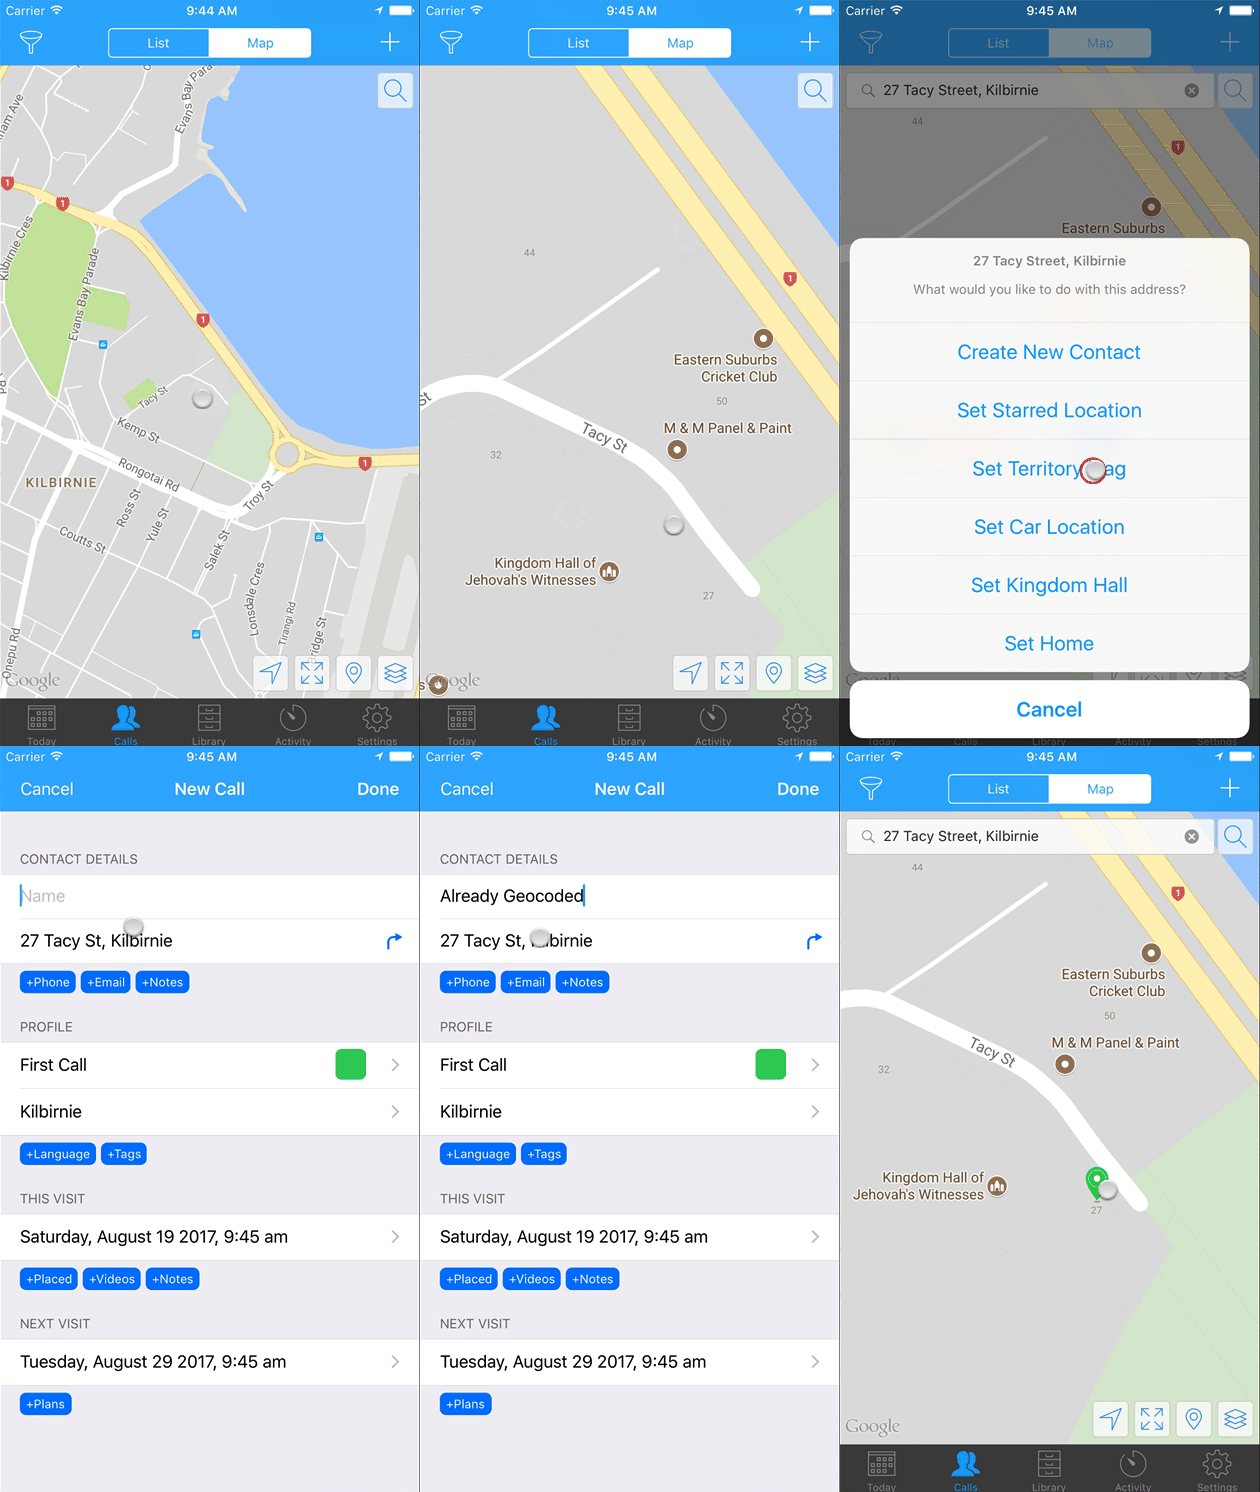
You are also able to enter a Contact directly from the Map.
- Zoom in enough on the Map so that you can see the correct address.
- Tip: In some countries Google will actually show you the street number of each address/property on the map, as shown in the screencast below. But in other countries Google does not show the street number until you actually click on the map and select a location.
- Tap+Hold on the location on the Map.
- Choose “Create New Contact” from the list of options.
This will take the Latitude and Longitude of the map location you clicked on, get the address of those co-ordinates, and create a new Contact – with the address and geocoding all done for you.
Example screencast from the Map
Moving Contact Markers on the Map
You can now tap on a Contact marker, and it will enter “move mode”. You will see crosshairs appear. You can now drag that marker to a new location. Simply tap elsewhere on the map to save the new location for that Contact.
Note that this method only applies to Contact Markers. To move Location Markers, like the Kingdom Hall for example, just tap+hold on the Map, and then click “Set Kingdom Hall”.
What about when Offline in Remote Locations?
Most mapping functions require an Internet connection to work. However some functionality can work even in remote areas with limited connectivity:
- When adding a Contact you can tap+hold on the address locator button and choose to “Insert Current Location”. This will use the GPS coordinates from your device as the location of the Contact, and you can type whatever you like into the Address field. Most iPhones and some iPads have an inbuilt GPS so this will allow you to geocode the Contact even if there is no active Internet connection.
- On the Map if you tap+hold on the Map, it will still allow you to perform most operations like “Add” even if you do not have Internet connectivity. It will use the latitude+longitude coordinates of the location you selected on the Map itself.
- If you add consecutive Contacts, you can tap+hold on the address locator button and choose “Insert Previous Address”. This option will only show if you have previously entered a Contact using the same app session. It will insert the Address and Locality of the previous contact BUT with the current GPS co-ordinates. This provides a faster method of entering consecutive addresses when you are without an Internet connection or in a location where the auto-completion of addresses is inaccurate.
See the screencast below for an example of these features in action…


